
If you are unsure about the procedures for home renovation, fret not. Follow these five simple steps to a fabulous-looking home.

The new year will probably see some homeowners moving into a new home and embarking on their home renovation. While most will likely choose a home renovation package, some may opt to do it in stages. In fact, this option is most ideal for those who do not wish to take a loan and will allow you to have better control over the cost.
That said, taking the first step in home renovation can indeed be a bewildering experience, especially for the uninitiated. I mean, where does one even start? This was indeed the question I asked myself when I first received the keys to my new home.
When embarking on my own home renovation project, I chose not to take a loan as I do not wish to burden myself with debt. While my DIY renovation project is still a work-in-progress, I had learnt a few things along the way.
Follow these tips so that your home renovation will go on without a hitch:
1. Work on your floor plan first
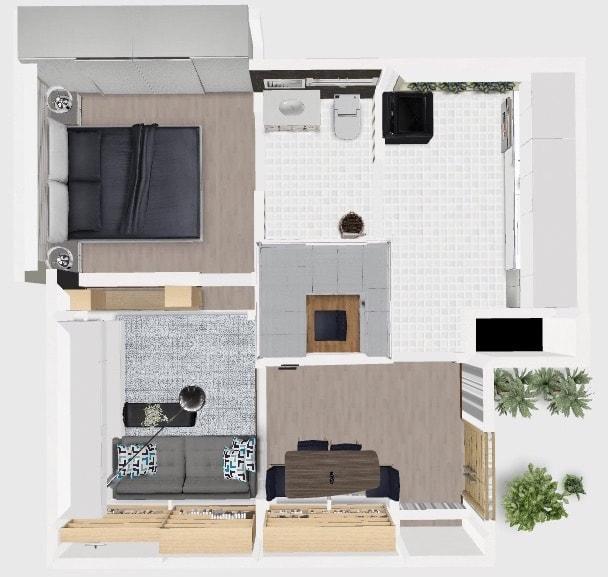
If you do not have an eye for interior design, then you should either engage an interior designer to do the proposed layout or utilise an interior design software/app like Homestyler.
For detailed tips on some of the basics of interior design, check out the article below.
2. Plan your lighting points from the floor plan before calling your ceiling contractor
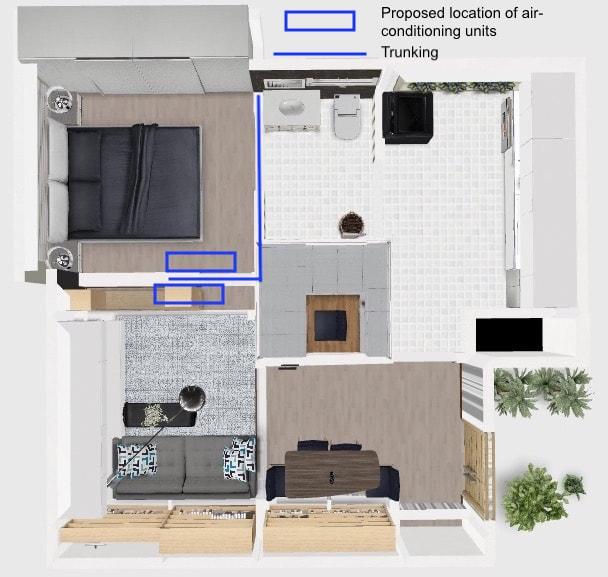
You can decide on the best placement by drawing the proposed locations onto your floor plan. The number of air-conditioning units depends on the size of your home.
Go for inverter units as they are energy saving and come with said modes. You will need to install your air-conditioner first, before working on the next step.
3. Work on the lighting points from the floor plan before calling in the ceiling contractor
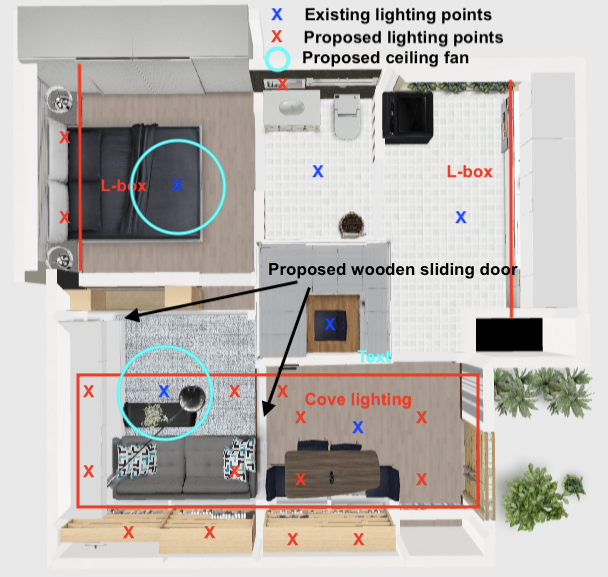
This is an important step before assigning a carpenter to install your cupboards and other permanent fittings.
As you can see from the floor plan that I have uploaded here, it shows the location of the existing lighting points.
From the location of the cupboards and fittings, you can then plan where you want to install any additional lighting points.
Be sure to plan this to a T as you will be charged quite a sum per lighting point – In Singapore, the costs are around S$65 (RM197).
Next, you need to order your own LED lights. There are many brands in the market, but I opted for Xiaomi Phillips Zhirui downlight as they are value-for-money and comes with an adjustable colour temperature feature that can be controlled from your smartphone. Unfortunately, they are not available in Malaysia, so you will need to order them online.
You then need to download the Mi Home app in order to control the lighting.
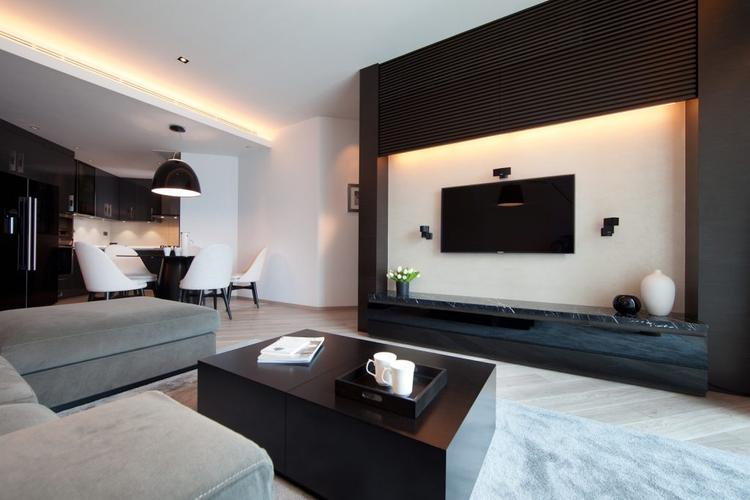
For ceiling works, you may opt for a combination of an L-box and cove lighting. An L-box can dramatically alter the ambience of your room, making it very welcoming while giving the illusion of height due to the indirect lighting. This will cost you from S$350 (RM1,061) onwards. Pricing in your country will differ according to contractor assigned.
You may also opt for a cove lighting to give a very clean and intimate feel to your living space.
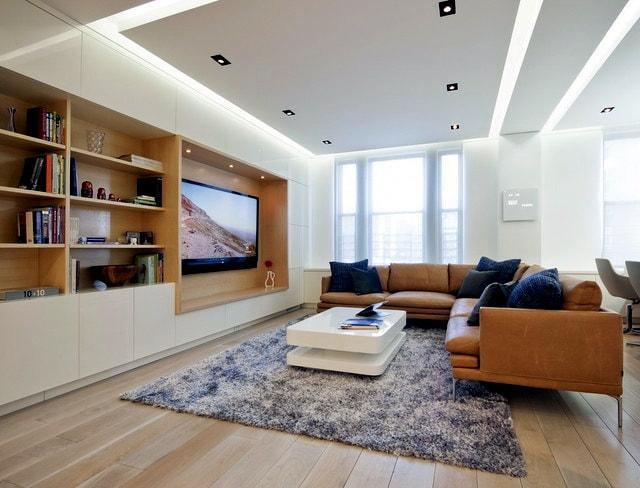
However, do bear in mind that it reduces your ceiling height due to the plastering and ceiling works. The cost varies according to the size – in Singapore, it typically starts from around S$500 (RM1,517) onwards.
You may also opt for centre ceiling flat panels, which cost around S$400 (RM1,213). The contractor will build the L-box and false ceiling around your already installed air-conditioning units.
Speaking of which, I would also urge you to install ceiling fans even if you already have an air-conditioning system in your home. This is because natural ventilation works best in our tropical weather and it can significantly cut down your electricity bill by up to 20-30%. Choose one that comes with LED lighting.
While there are many brands in the market, most are not aesthetically pleasing. You should opt for a timeless design like the Haiku L-Series Fan. Although slightly pricey, the fan is surprisingly quiet and comes with 16 levels of brightness. I chose black as they fit in with the monochromatic colour scheme of my home.
As for installation, you can have it installed for you (assuming the rest of the lighting works are already done). In my case, the ceiling contractor charged me S$60 (RM182) for the installation.
Remember, you will need to show this lighting plan to the ceiling contractor/electrician so they can execute it accordingly. Try to get at least three quotations. Word-of-mouth referrals, in my opinion, work best.
4. Call in the carpenter
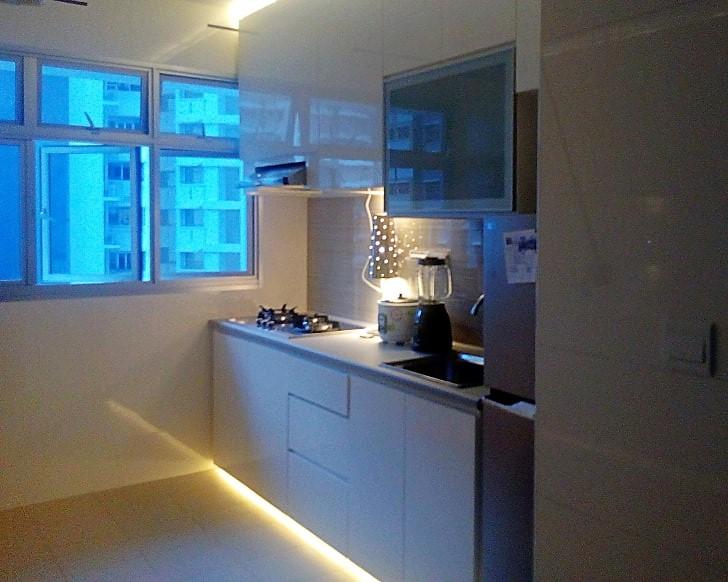
After you have installed your lighting and are finished with your ceiling works, it is time to work on the rest of your fittings like kitchen cabinets and cupboards.
The carpenter can build your fittings up to the height of your false ceiling. Generally, fittings will require a space of around 600mm.
However, if you have limited space, a measurement of 300mm minimum works just fine, especially if it is for your display cabinet in the living room. If you need a flexible living space, go for sliding/foldable doors.
Singaporean homeowners should check out Ewins, I particularly like their doors as they come in a myriad of designs and are customisable to suit your living space. They are slightly pricey, but are worth considering, especially if you live in a small apartment like mine.
The staff there can help you draft a design first, before proceeding to install the fittings.
5. Blinds/curtains should be the last

Now that you have everything else in place, you can dress up your windows with either curtains or blinds. Curtains will require regular washing so it may not be ideal if you do not have the time to do it.
If you want a clean, modern look, then blinds are the way to go. They are many options to choose from in the market to suit any theme you have in mind.
At the end of the day, a DIY home renovation project will require 110% of your commitment, time and attention but the outcome will be worth it. Remember to not spend more than 10% of the purchase price of your home and to use neutral colours as they are easy on the eyes. Most importantly, enjoy the entire process, do not rush it and unleash your creativity to make the living space uniquely yours.
This article was originally published as 6 useful home DIY renovation tips for dummies first published on khaliladis.com | Edited by Reena Kaur Bhatt